
Use File Field to collect required documents from customers through the Jira Service Management portal.
In this example, we will create a Request a contract review request type with a required Contract to review field.
Before You Begin
Make sure that:
-
File Field is installed on your Jira Cloud site.
-
You can create and configure Jira fields.
-
You can configure request types in the relevant Jira Service Management space.
1. Create the File Field
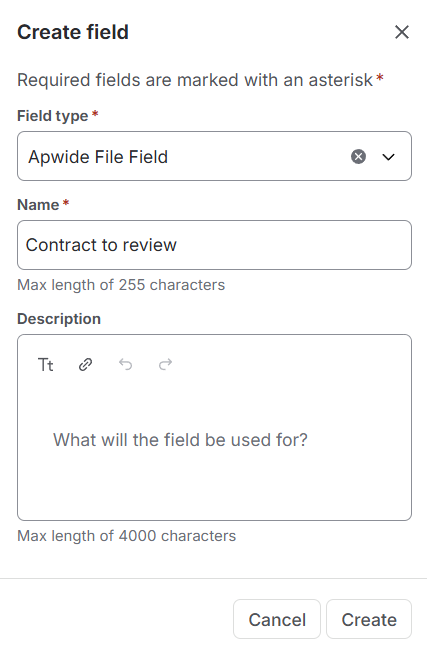
Create a new custom field of type Apwide File Field:
-
Open the Jira settings (top-right gear icon).
-
Select Work items.
-
Select Fields.
-
Select Create new field.
-
Search for and select Apwide File Field.
-
Enter a name for the field, such as
Contract to review. -
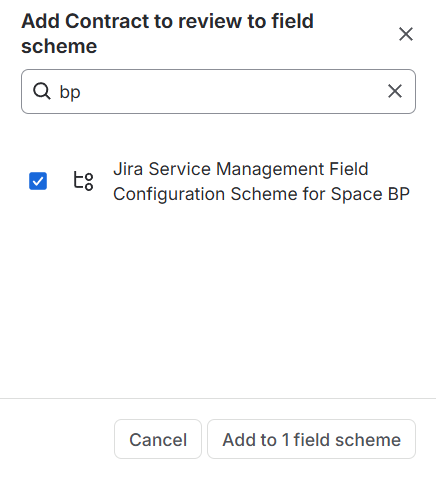
Add the field to the relevant field scheme.
Atlassian is currently rolling out changes to how fields are configured in Jira. Depending on your site, you may still see field configurations instead of field schemes. The process remains the same: make sure the field is added to the configuration used by your Jira space.
2. Configure the Upload Restrictions
Configure the field according to the documents you want to collect:
-
Locate your field in the Fields section.
-
Select Contexts and default values in the Actions (three-dots) menu next to your field.
-
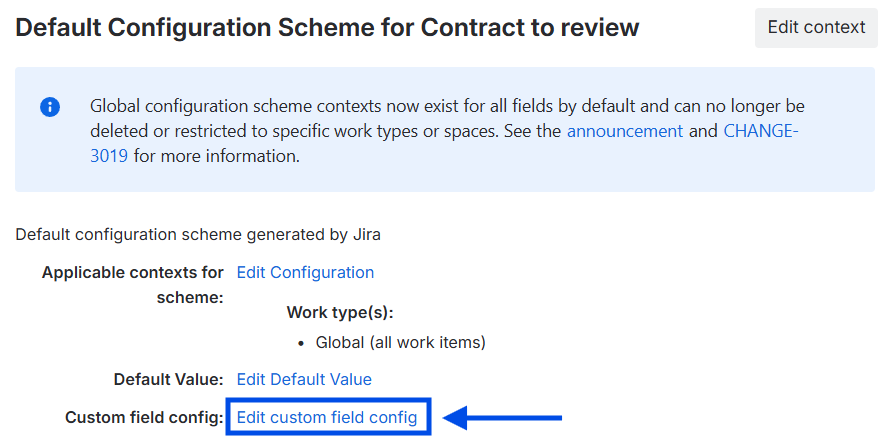
Select Edit custom field config in the relevant configuration scheme.
For this example, use the following configuration:
|
Option |
Value |
|---|---|
|
Max quantity of files |
|
|
Allowed file type |
|
|
Custom file types |
[empty] |
|
Maximum file size |
|
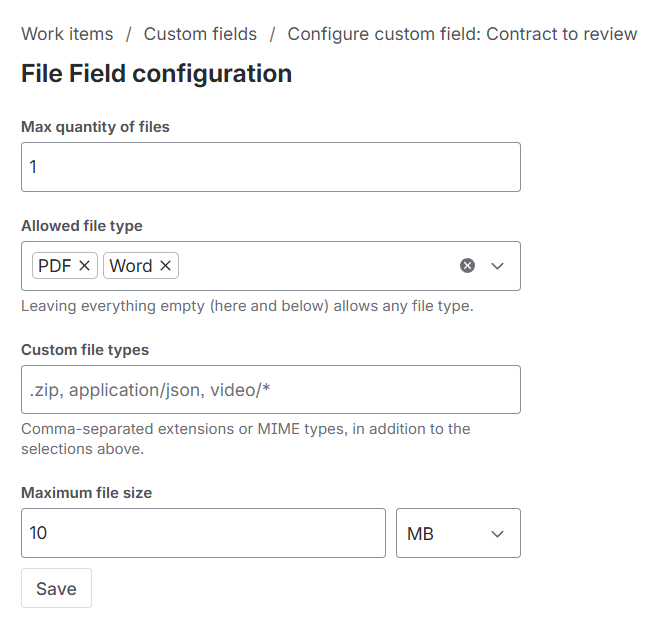
Select Save to apply the configuration.
For more information about the available settings, see Custom Field Options.
3. Create the Request Type
Create the service request that customers will use to submit contracts:
-
Open the relevant service space.
-
Select Space settings.
-
Select Request management, then Request types.
-
Create a request type named
Request a contract review. -
Select the Jira work type that will be used for these requests.
You can start with a simple request form. The Contract to review field will be added in a later step.
4. Add the Field to the Jira Screens
Add the Contract to review field to the screens used by the Jira work type selected for the request:
-
In the Request management section, select Screens.
-
Find the work type used by Request a contract review.
-
Add the Contract to review field to the relevant Create, Edit, and View screens.
Depending on your Jira configuration, the same screen may be used for the Create, Edit, and View operations. At minimum, add the field to the Create screen so it becomes available when configuring the request form.
5. Add the Field to the Request Form
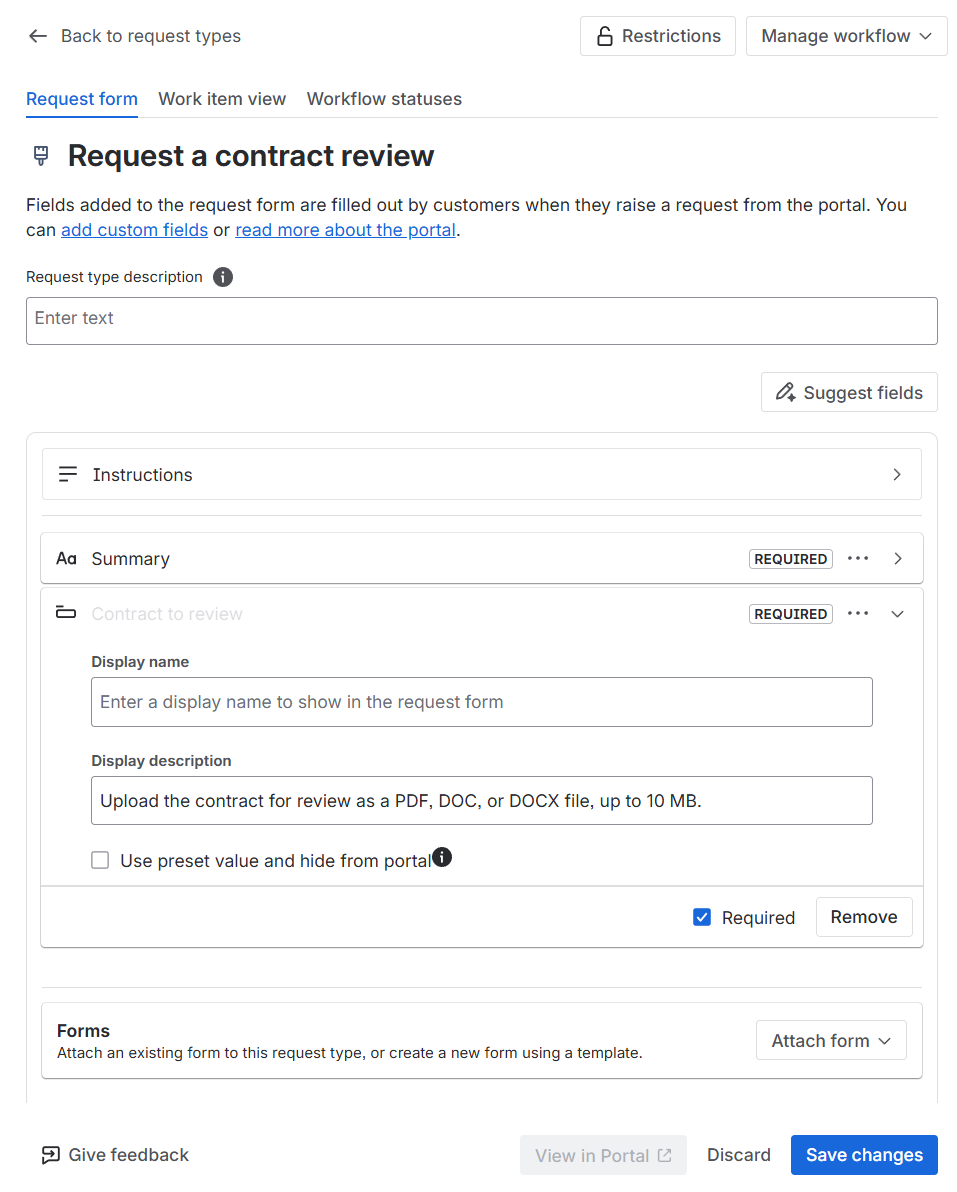
Open the Request a contract review request type, then add the Contract to review field to its request form:
Display name
Contract to review
Description
Upload the contract for review as a PDF, DOC, or DOCX file, up to 10 MB.
Enable Required so customers cannot submit the request without uploading a valid contract.
6. Test the Request
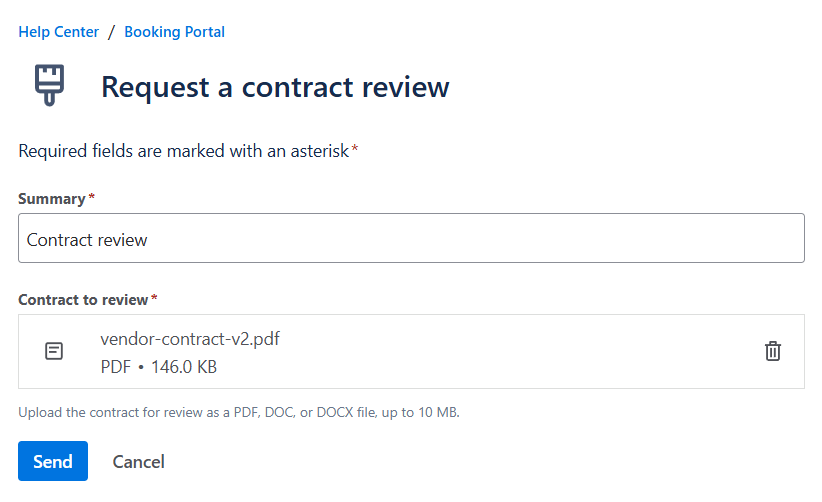
Open the customer portal and submit a test request.
Confirm that:
-
A valid PDF, DOC, or DOCX file can be uploaded.
-
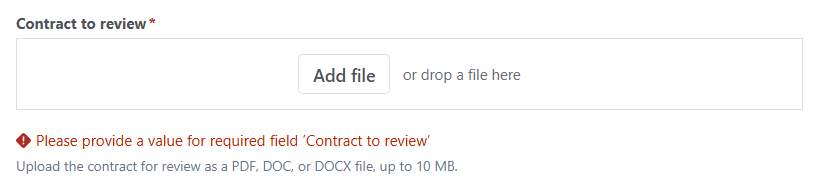
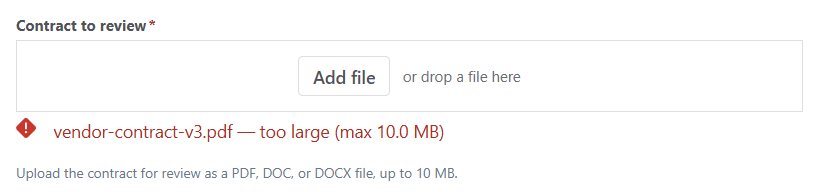
Unsupported or oversized files are rejected.
-
The request cannot be submitted without a contract.
7. Review the Submitted Contract
Open the submitted request in Jira.
The uploaded contract appears in the dedicated Contract to review field, where agents can preview or download it.
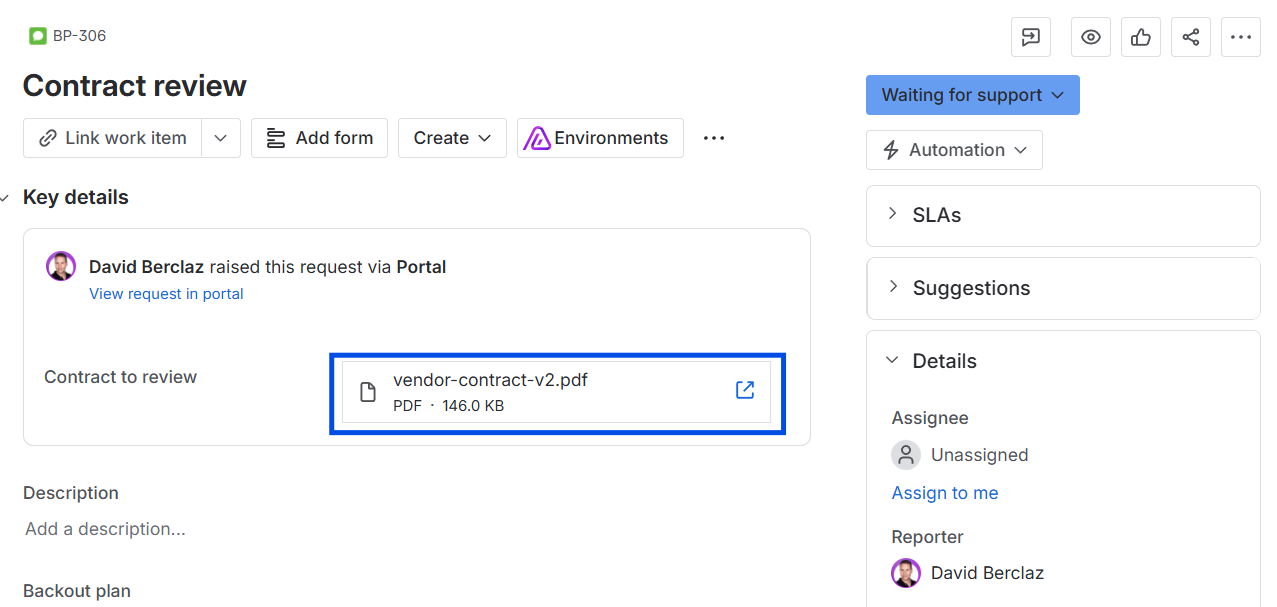
Using a dedicated field keeps the contract separate from unrelated attachments added during the review process.
Related Use Cases
You can use the same approach to collect:
-
Proof of purchase for refund requests
-
Identity documents for access requests
-
Certificates for compliance reviews
-
Test evidence for validation workflows
You can also search File Field metadata with JQL and use it in Jira Automation rules.
See JQL Properties for the available search options.
Need Assistance?
For help configuring File Field for Jira Service Management, reach out to our Customer Portal.